Hello there 👋!
We just released our next software update: 4.0.0. This update includes bug fixes and features including:
Opentrons is excited to release a feature that will generate an even more accurate and reliable OT-2 user experience. We’ve revamped robot calibration and are proud to announce our overhauled Deck calibration, Tip Length calibration and Pipette Offset calibration. In this article, we’ll provide an overview of the major changes we’ve made to robot calibration, explain what calibration means and break down each calibration process in detail.
Below are the major changes we’ve implemented for our revamped OT-2 Robot Calibration:
1. We created 3 unique robot calibrations: Deck calibration, Tip Length calibration and Pipette Offset calibration. Because these are now 3 separate processes, you will be able to troubleshoot issues more easily.
2. We removed Tip Probe from pre-protocol flow and replaced it with the more accurate Tip Length and Pipette Offset Calibration processes.
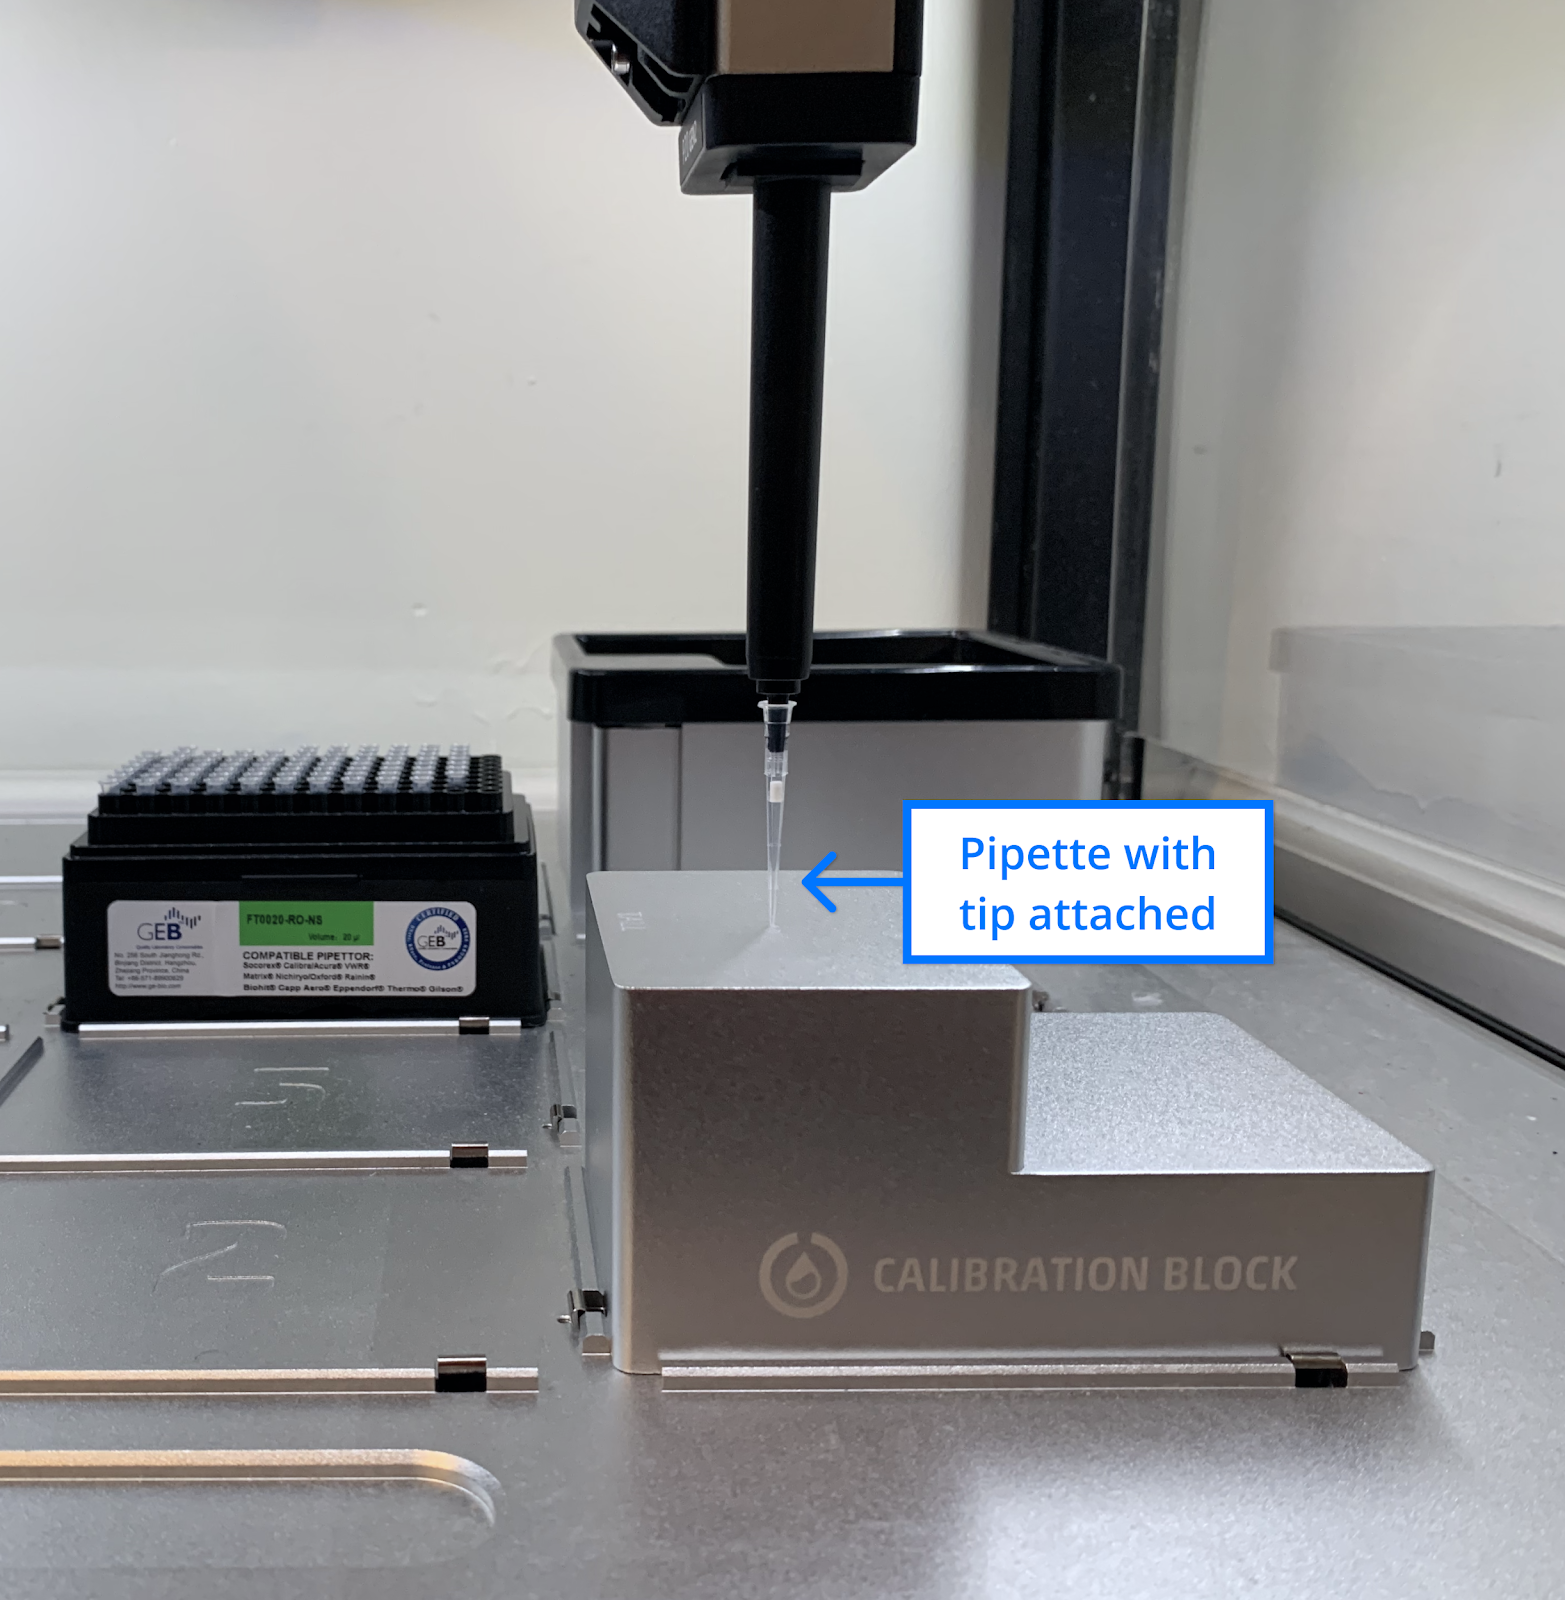
3. We have created a Calibration Block to make Tip Length calibration easier and more accurate. If you don’t have one, please contact your local rep or get in touch with the Opentrons team at [email protected] for assistance.
4. We’ve exposed robot calibration data via a download link, making it easier to help support in diagnosing any problems that come up.
If you have created positional tweaks in your protocol or labware calibrations, you will need to recalibrate your labware and adjust your protocol code to remove any positional tweaks.
When we describe calibration of the OT-2, it refers to accurately positioning the robot’s pipette(s) to a point or position on the deck. We have revamped the OT-2’s calibration system to enable a more accurate, reliable, and consistent pipetting experience. To achieve this, we designed a 3-step process: Tip Length Calibration, Pipette Offset Calibration and Deck Calibration. We will break down how this 3-step process improves pipetting for your robot, run after run.

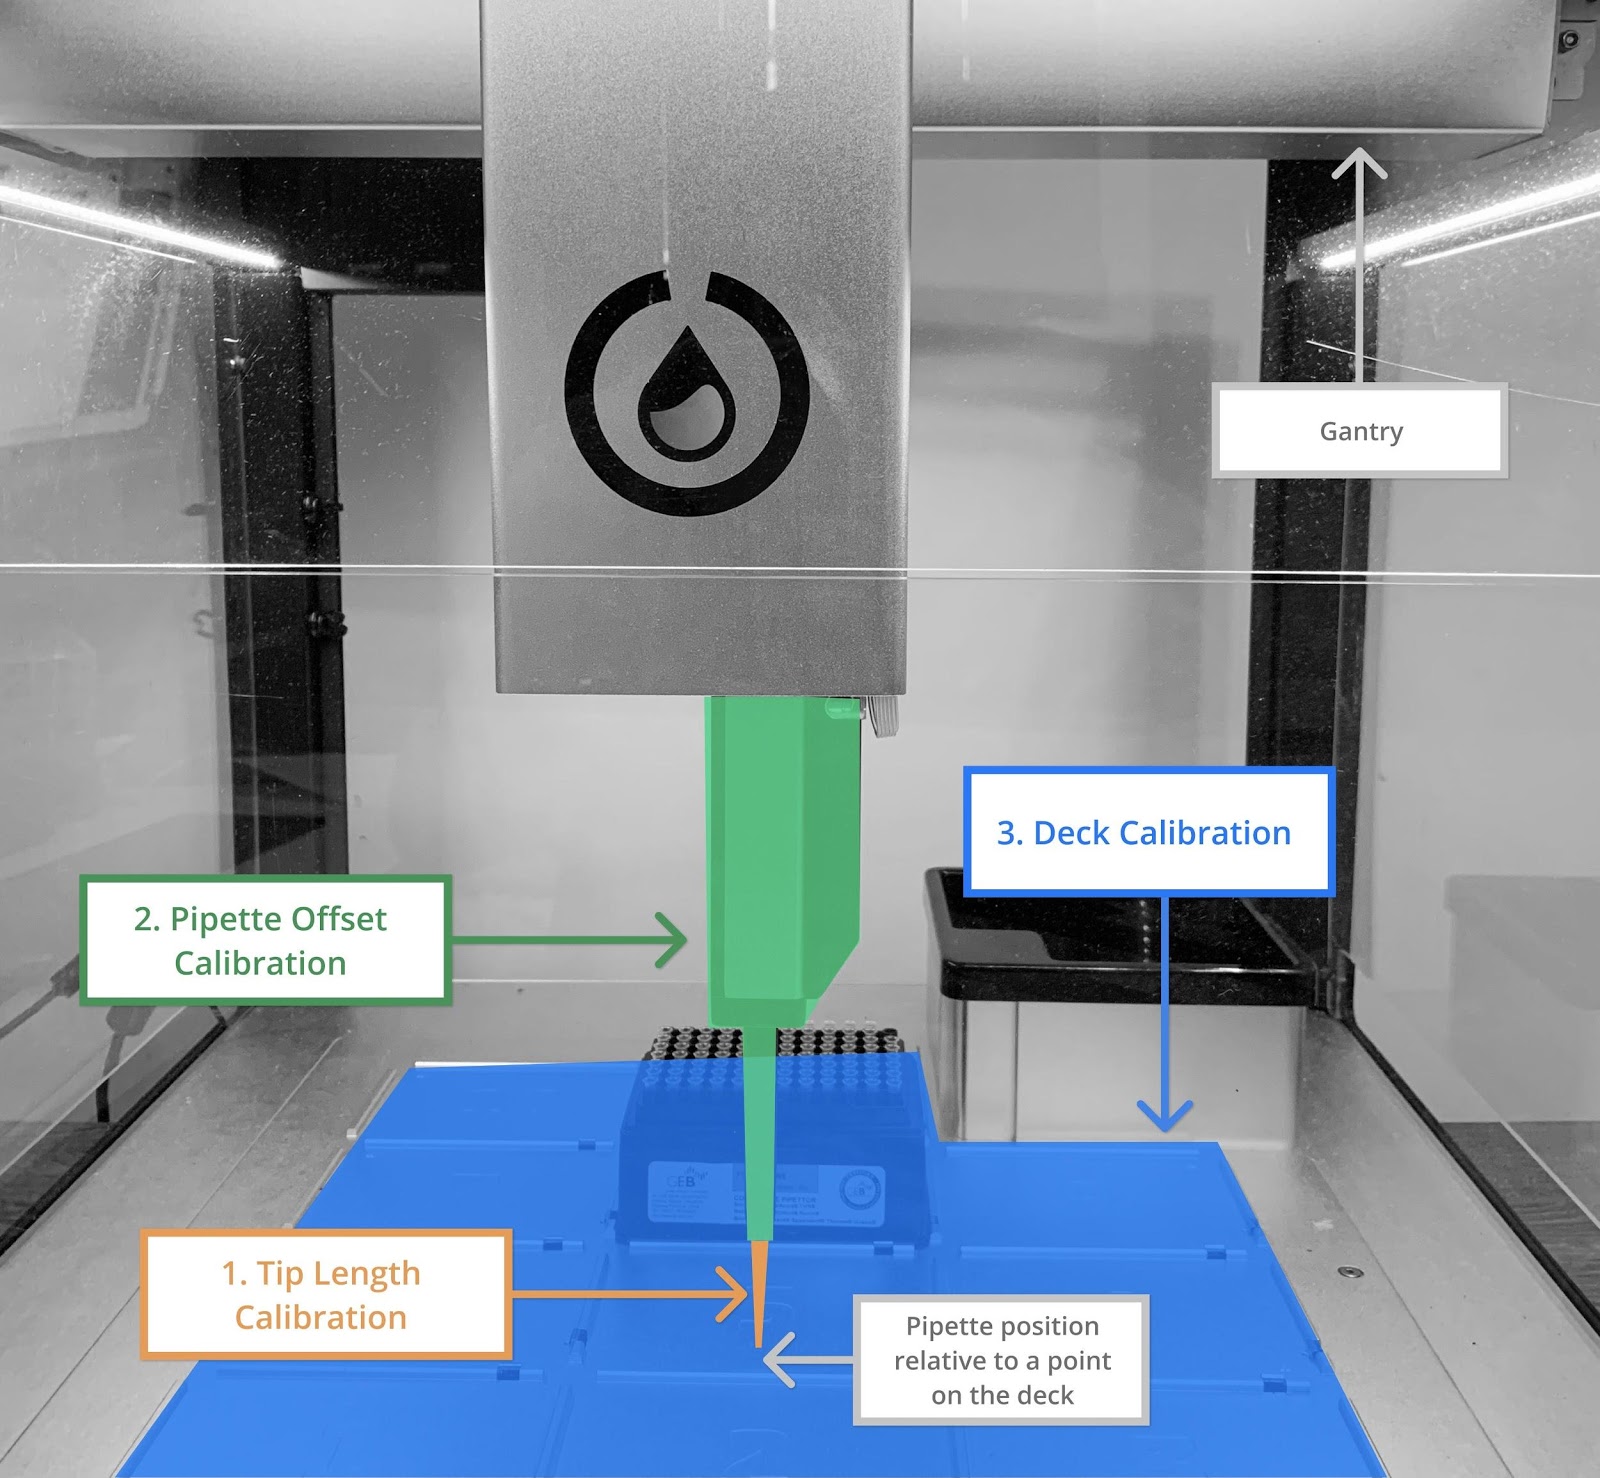
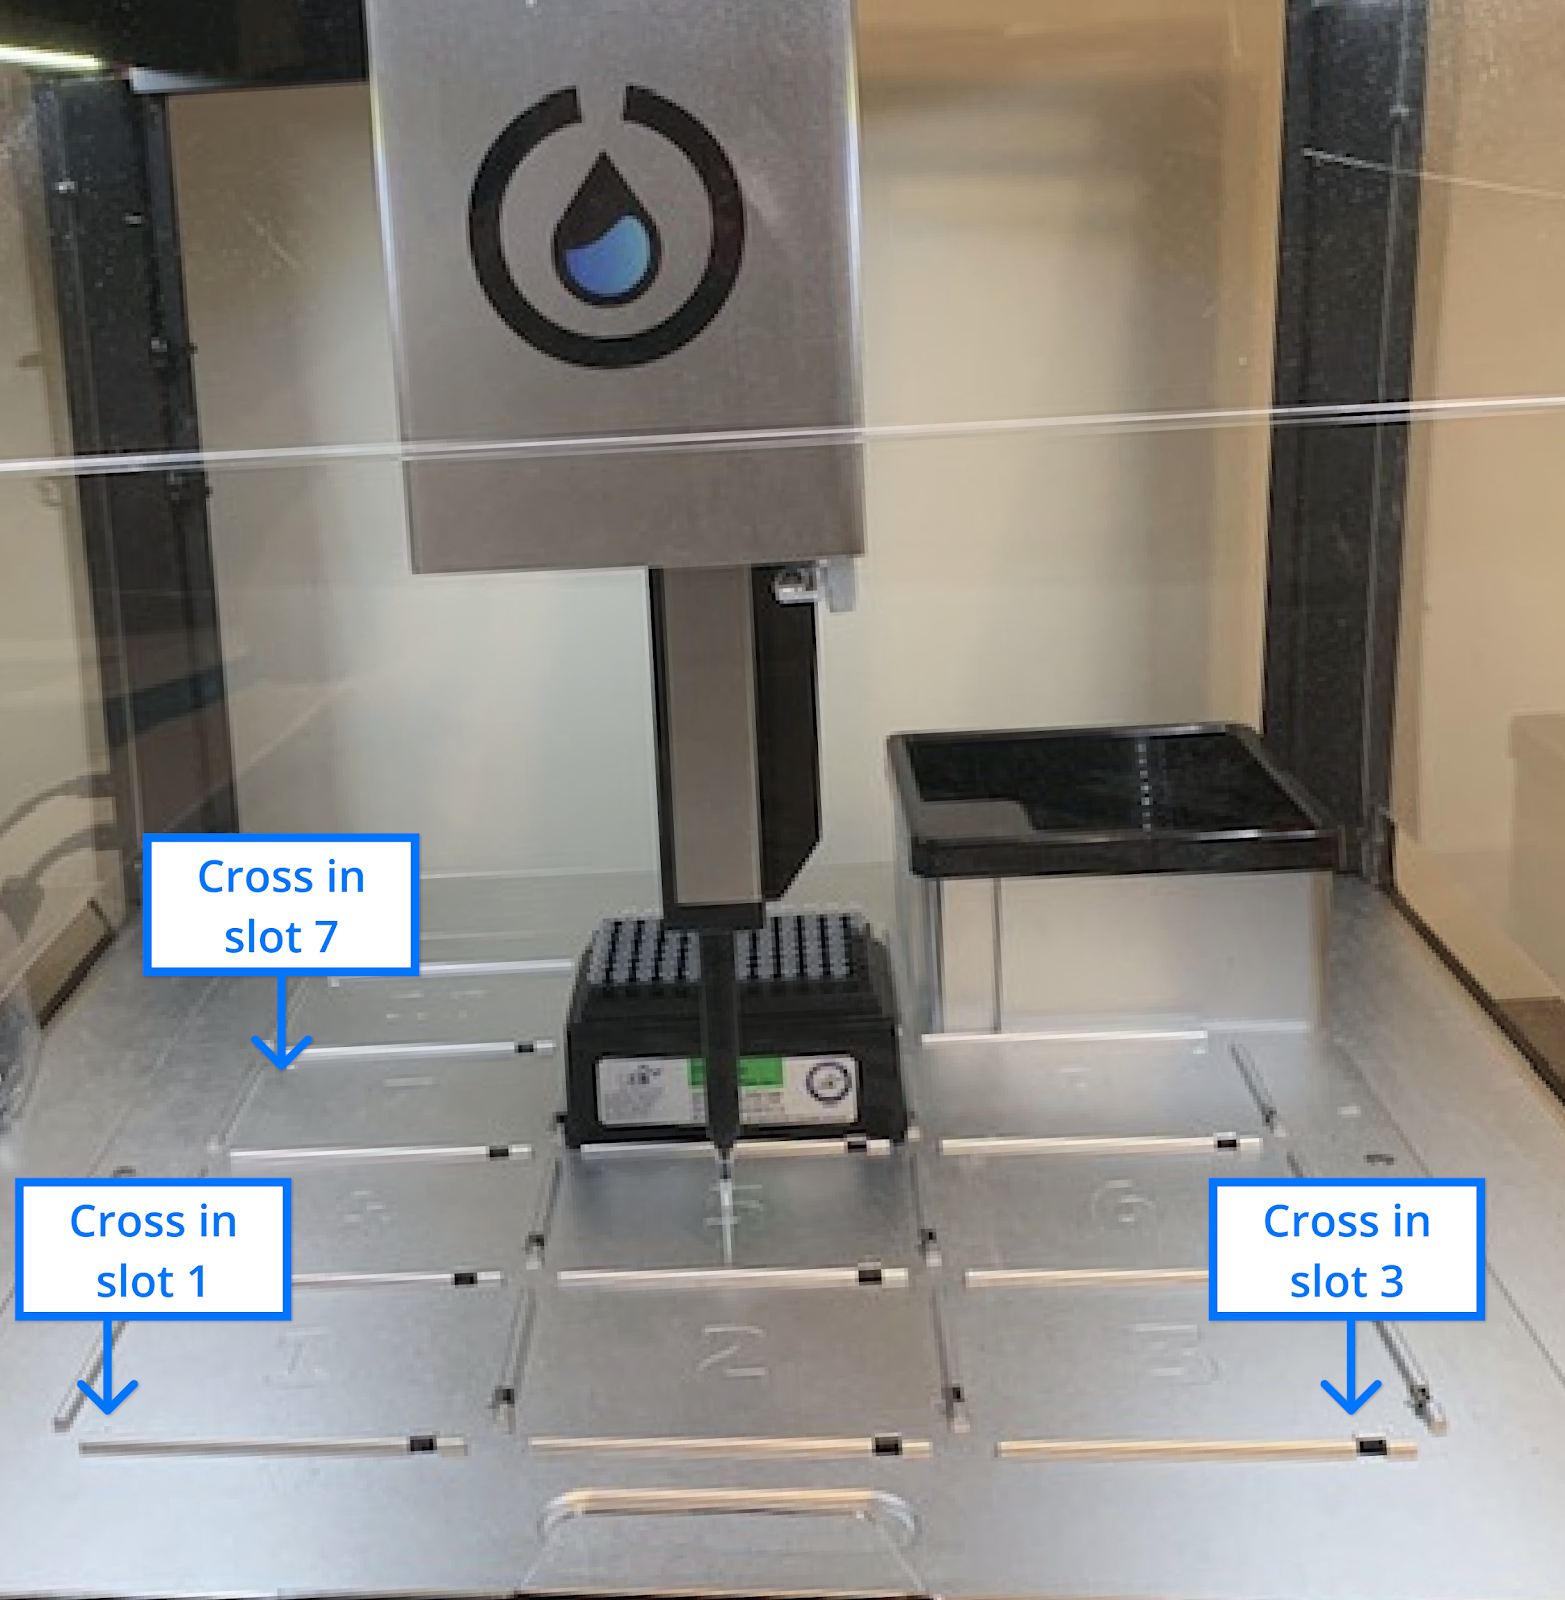
A user calibrates their deck to ensure the gantry (the bar that moves the pipettes) moves accurately to any point on the robot’s deck. You will only need to do a Deck calibration when you unbox a new robot, physically move your robot or if Calibration Health Check recommends recalibrating.
You calibrate your deck by picking up a tip and jogging the robot to the cross in Slot 1, Slot 3 and Slot 7.
Important note regarding legacy Deck Calibration: Your deck calibration data from the previous system will be migrated when you update to 4.0, but it is highly recommended to recalibrate your deck with this new process.
Tip Length Calibration calculates the length of a specific tip from the end of the pipette nozzle to the end of the tip. This ensures the accuracy of the pipette’s motion in Z (down to the deck of the OT-2). Because of subtle manufacturing variances between pipettes, Tip Length Calibration is executed for each tip model and each individual pipette. You will do a Tip Length Calibration when calibrating a new pipette, or as a part of the pre-protocol experience.
Some pipettes cannot reach the deck of the robot when a tip is not attached, so we created the Calibration Block to help. If you do not have one, you can request one here. It is ideal to use a Calibration Block during Tip Length calibration, but if you don’t have one yet, you can use the flat surface on the removable black plastic trash bin.
Important note regarding legacy Tip Length Calibration: Previously, you would calibrate your tip-length as part of the Pipette Calibration process using the tip probe tool underneath the trash bin lid. That measurement will not be migrated when you update to 4.0. You will need to calibrate your tip length using this new process for each pipette before running a protocol
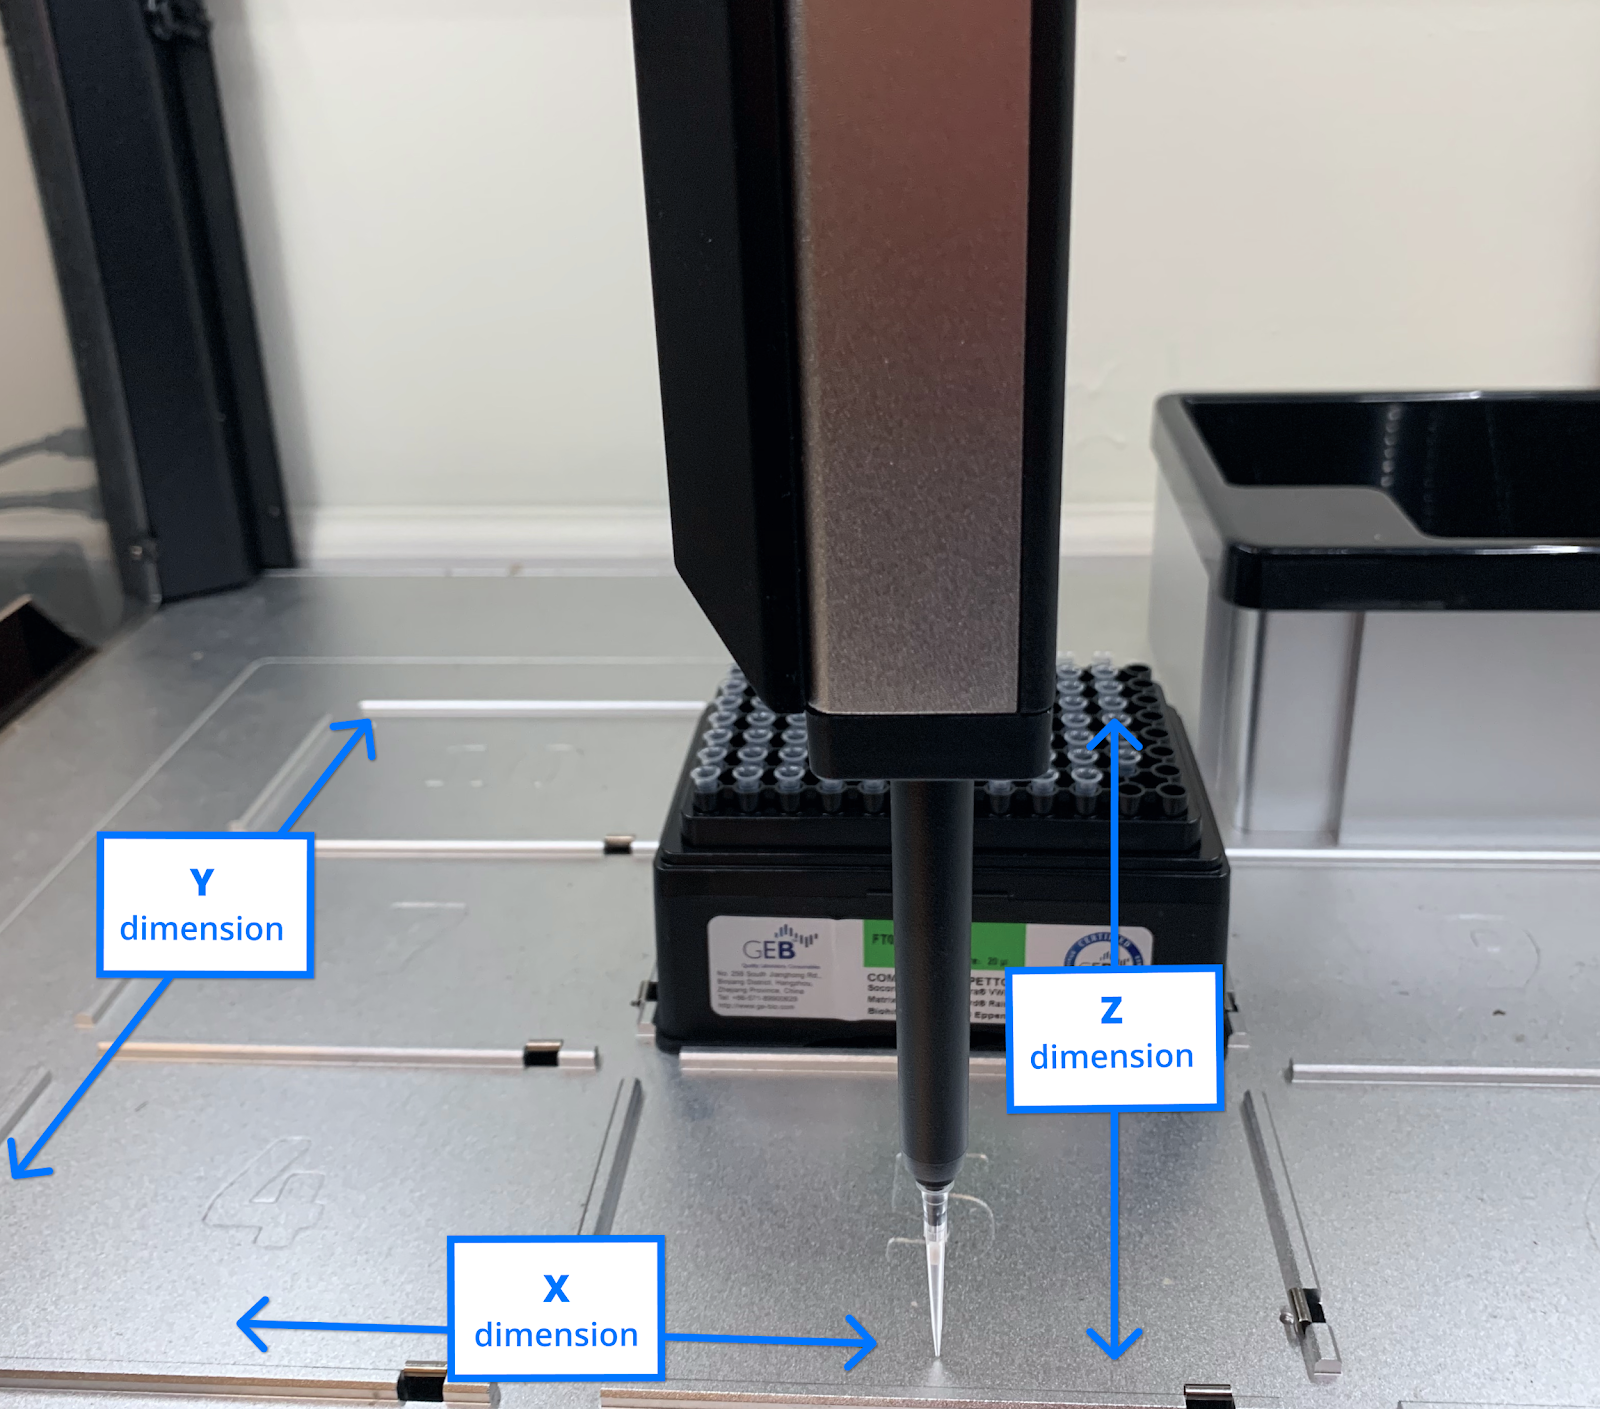
A user will do Pipette Offset calibration for each unique pipette that’s attached to a specific mount. This calibration calculates the X, Y and Z position of the pipette in relation to the robot deck. Because of subtle manufacturing variances between pipettes, it is important to calibrate every unique pipette for each specific mount.
Example: if you mount a P20 Single GEN2 on the left mount, you’ll perform a Pipette Offset Calibration. If you move that pipette to the right mount, you will have to perform Pipette Offset calibration again. If you remove then re-attach that pipette to the left mount again, you will NOT have to redo the left mount pipette offset calibration.
Important note regarding legacy Pipette Calibration: Previously, you calibrated your pipette offset as part of the Pipette Calibration process using the tip probe tool underneath the trash bin lid. That measurement will not be migrated with this update. You will need to calibrate your pipette offset for each attached pipette before running a protocol.
If you need any additional information or clarification, please reach out to [email protected].